AWS AppSync integration with React Native(part-1)

AppSync automatically updates the data in web and mobile apps in real time, and updates data for offline users as soon as they reconnect. We can connect the AppSync with React Native to store data offline.
It uses GraphQL, an open standard query language that makes it easy for applications to request data from the cloud.
One of the major benefit of GraphQL is we receive only those data which we requested instead of full junk.
This has been divided into two Parts:
- Configure AppSync. (Part-1)
- Integrate AppSync with App. (Part-2)
Before We get started, we need to set up our development system for developing React Native applications. We need:
- Xcode
- An iOS simulator
- Android Studio
- A suitable SDK and emulator.
- Node.js
- React Native command line interface (CLI)
- Install with npm install -g react-native-cli
Configure AppSync. (Part-1) 🔗
I have integrated AppSync into my project. We can integrate AppSync with following steps:
Initially we need to clone the repo:
Clone the repository: https://github.com/suprabhasupi/aws-mobile-react-native-notes-tutorial
$ yarn install$ yarn run ios(This will open the simulator, where the output comes)Open https://console.aws.amazon.com/appsync/home?region=us-east-1#/apis
Click on create API button which is there in right side corner
- Write any name
- Select Custom Schema
- Click Create
- Click Schema on left hand menu
- Copy this below code
type Note {  noteId: ID! title: String! content: String!}
type Query {  getNote(noteId: ID!): Note allNote(count: Int, nextToken: String): [Note]}
type Mutation { putNote(noteId: ID!, title: String!, content: String!): Note deleteNote(noteId: ID!): Note } schema { query:Query mutation:Mutation}- Click create resources. Select data source from the dropdown.
- Scroll to the bottom of the page, and then click Create
- Wait for the DynamoDB “create table” operation to complete.
Now, We need to create resolver for each operation (query/mutation). And attach to it. Writing resolver for below template, requires knowledge of DynamoDB operations and context layout for AppSync. After creating each operation, Save the changes.
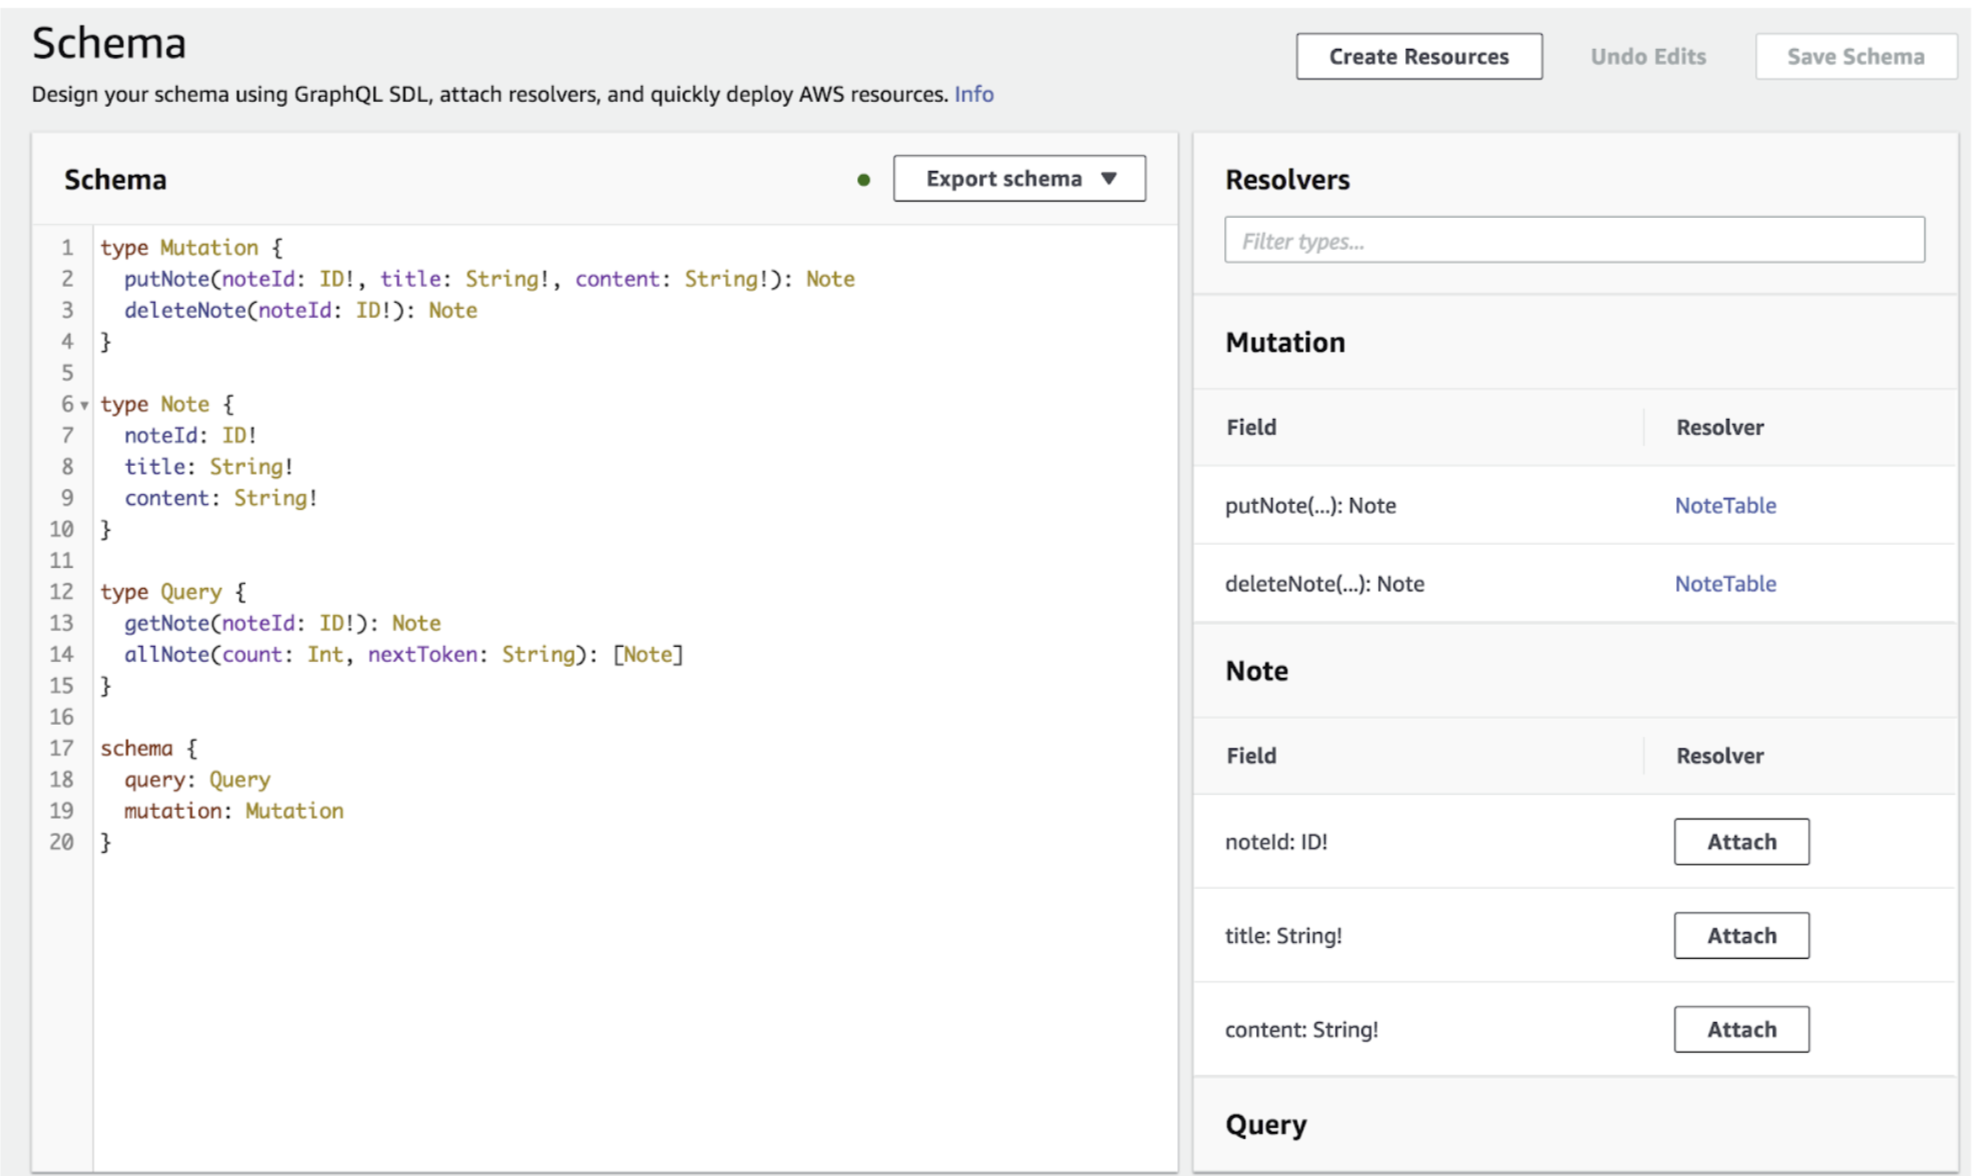
Below there are some resolver for those operations:
MUTATIONS
1. For PutNote template:
Configure the request mapping template:-
{ "version" : "2018-09-12", "operation" : "PutItem", "key": { "noteId": $util.dynamodb.toDynamoDBJson($ctx.args.noteId), }, "attributeValues" : { "title": $util.dynamodb.toDynamoDBJson($ctx.args.title), "content": $util.dynamodb.toDynamoDBJson($ctx.args.content), }}NOTE:
"noteId" :- It’s a variable name in table, where we are passing `($ctx.args.noteId)`: noteId parameter from mutation operation. This goes for both title and content which we are passing in attributeValues.For the response template, Configure the response mapping template.
$util.toJson($ctx.result)2. For DeleteNote Template:
Configure the request mapping template:-
{ "version" : "2017-02-28", "operation" : "DeleteItem", "key" : { "noteId": $util.dynamodb.toDynamoDBJson($ctx.args.noteId) }}For the response template, Configure the response mapping template.
$util.toJson($ctx.result)QUERY 📖
1. For GetSingleNote template:
Configure the request mapping template:-
{ "version": "2017-02-28", "operation": "GetItem", "key": { "noteId": $util.dynamodb.toDynamoDBJson($ctx.args.noteId), }}For the response template, Configure the response mapping template.
$util.toJson($ctx.result)2. For AllNote template:
Configure the request mapping template:-
{ "version": "2017-02-28", "operation": "Scan", "limit": $util.defaultIfNull($ctx.args.count, 20), "nextToken": $util.toJson($util.defaultIfNullOrEmpty($ctx.args.nextToken, null))}NOTE:
Limit:- It express how many item we need to show in one call of query.
For the response template, Configure the response mapping template.
$util.toJson($ctx.result.items)Now, After creating resolver for all operations we can test the changes. After Creating the note, we can check into DynamoDB it’s created 🙂
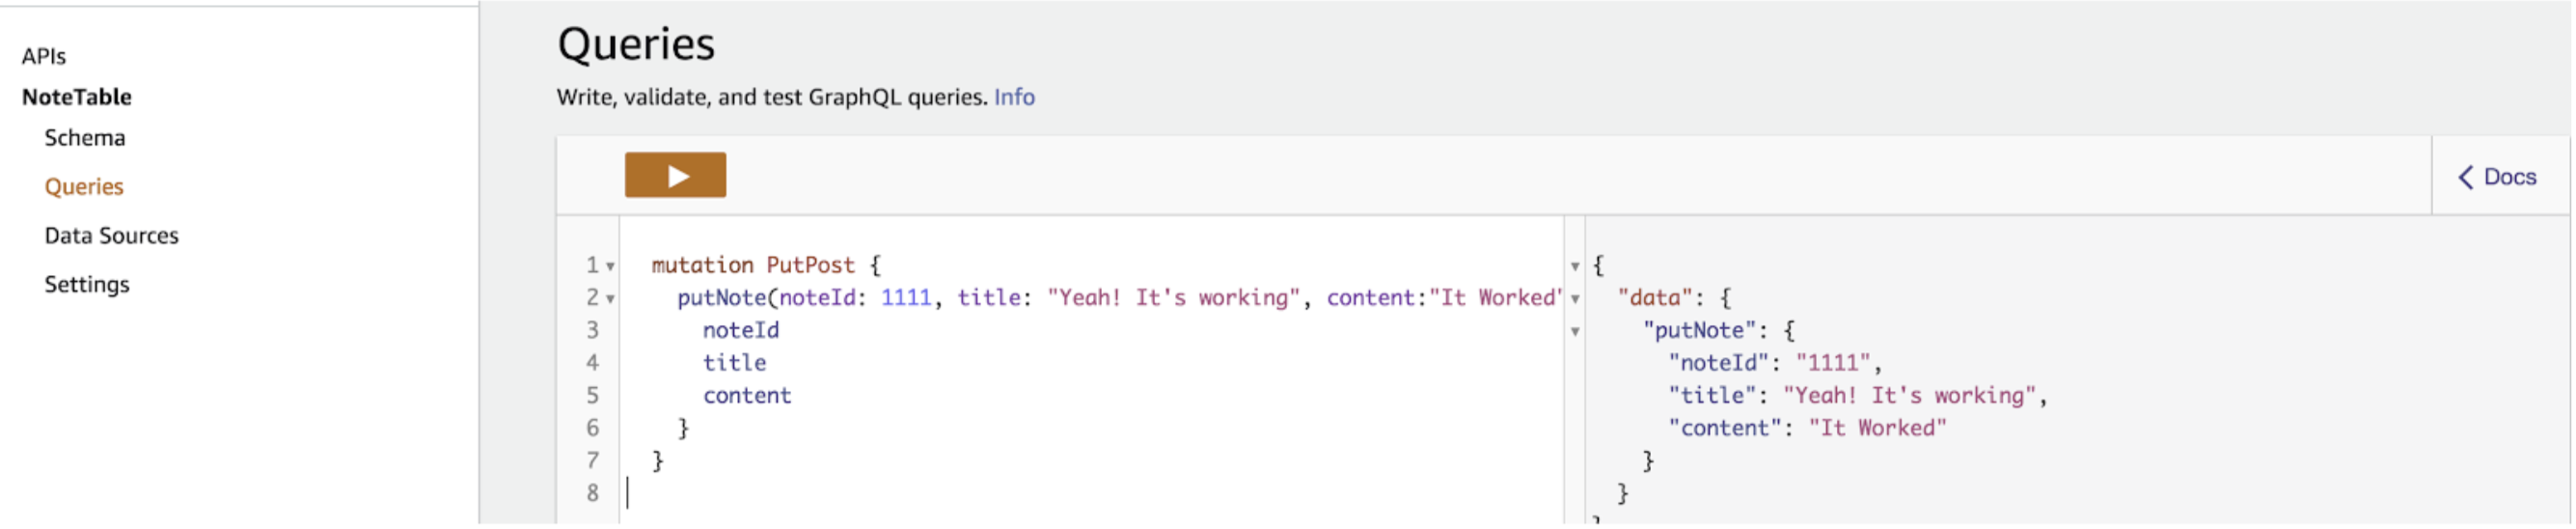
After Creating the note, we can check into DynamoDB it’s created :)
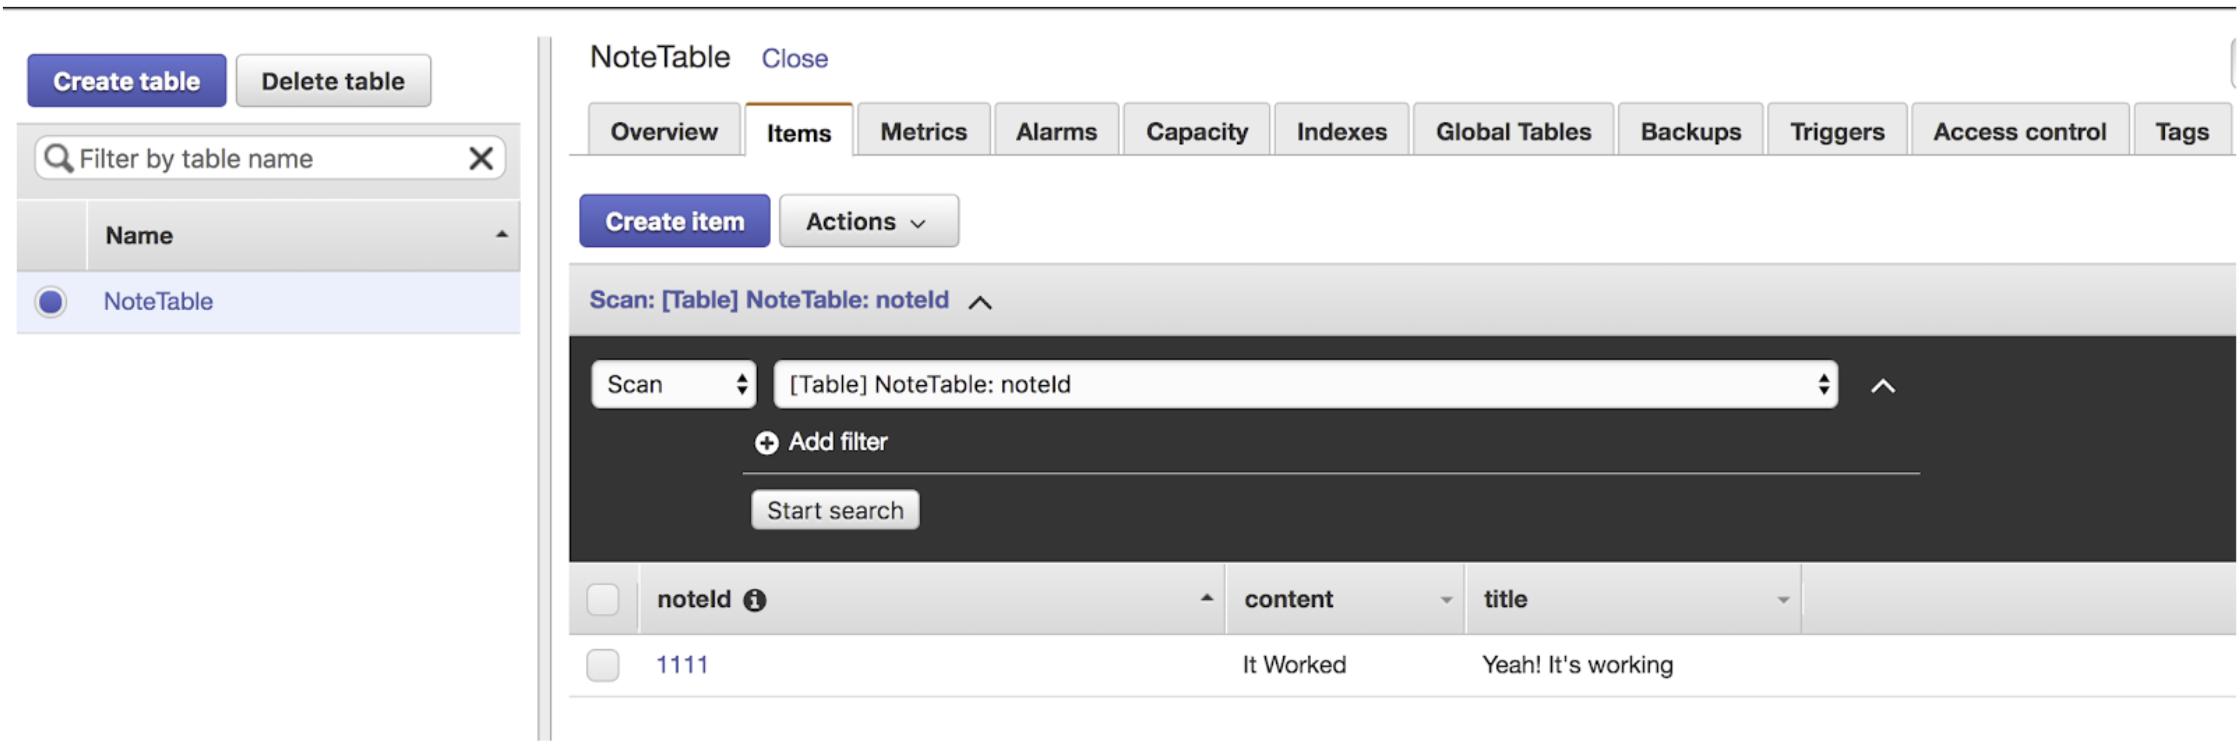
In same way, we can get the note, list of note and Delete the note.
You can check all queries by copy the below query:
###### Creating Note #######mutation PutPost {  putNote(noteId: 1112, title: "Yeah! It's working 2", content:"It Worked 2") {    noteId    title    content  }}
###### Deleting Note #######mutation PutPost1 {  deleteNote(noteId: 1111) {    noteId    title  }}
###### Get List of Note #######query GetPost {  allNote(count: 10) {    title  }}
###### Get Single Note #######query GetPost1 {  getNote(noteId: "1112") {    noteId    title    content  }}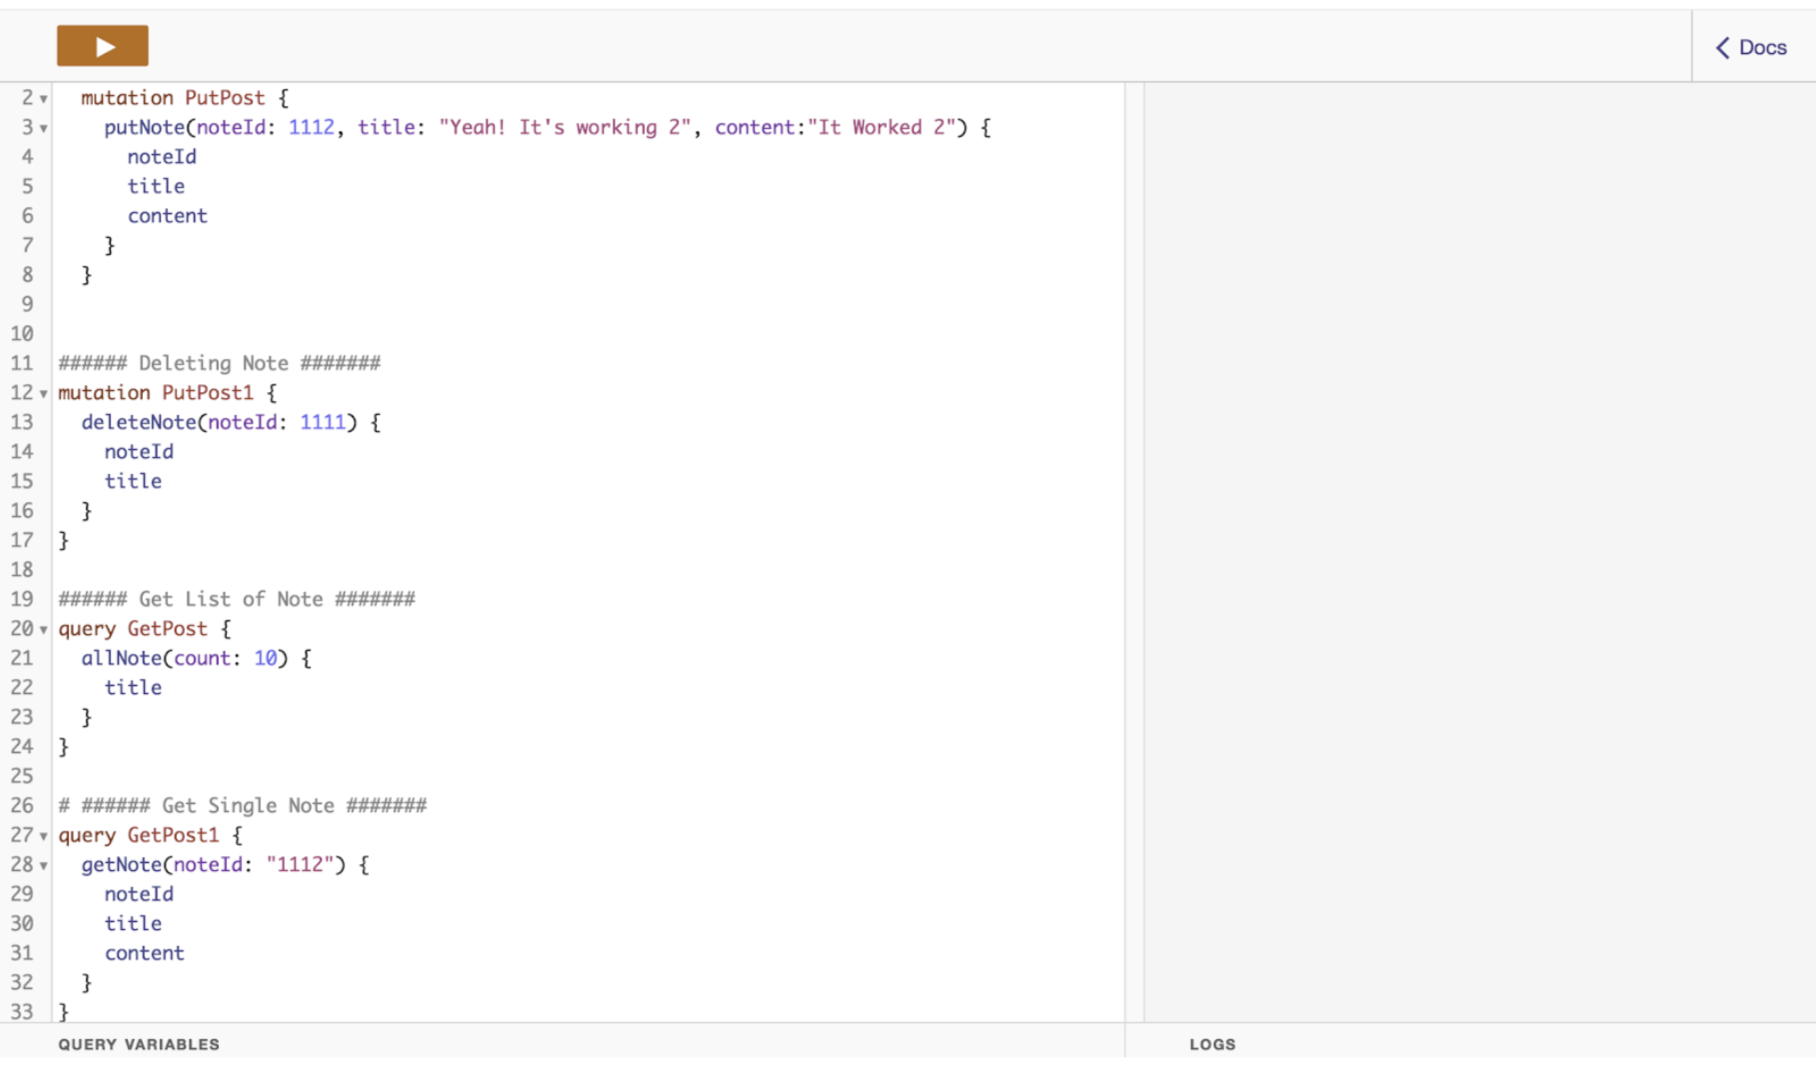
In last but not least, we are done with setting up AppSync. In Part 2 , We are going to integrate AppSync to our app. 😎